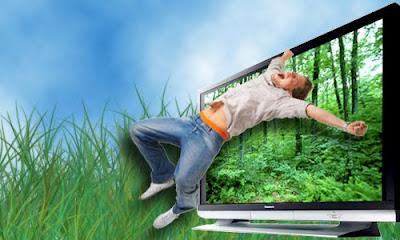
Hello every one this is the new tutorial of how to create out of bound photo effect in adobe photoshop cs3 its lot of tut available on the internet but every body have his own mind his thoughts different to others so this is mine final.
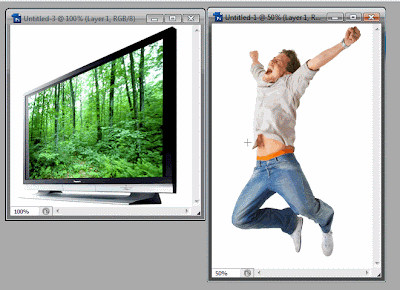
 1. First of all take these two pictures i have search on the google to find these.
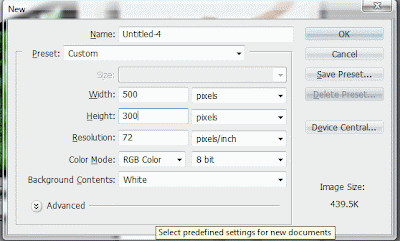
 2. Open new Canvas like these settings.
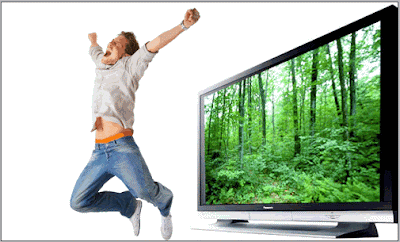
 3. Bring two pictures into recently created canvas by selecting move tool ( V ) and click inside of the canvas and hold down the left mouse button drag over you new canvas repeat this step for second picture and your canvas should looks like mine but first remove any background of you picture if you are not now how follow my tut(Changing Background From Single Color).
 4. Now select the background layer in the layer palette and choose bright blue color as a foreground and white for background see the picture below. Then go to the Filter >> Render >> Cloud to apply the cloud filter our background layer.
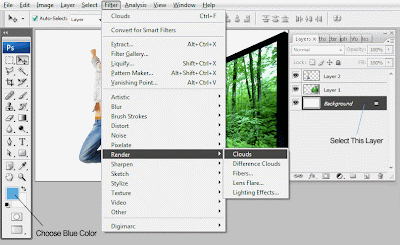 5. Now in the next step select the man in the canvas by clicking its layer icon in the layer palette or alternatively select move tool in the toolbar and make sure in the option bar auto select checkbox is checked and in the drop down choose layer then click any layer in the canvas to
easily select it. Then hit on the key board ( Ctrl + T ) to bring handles now drag your cursor out of the handles you will be noticed it has convert the arrow to rounded arrow now click and hold down the mouse left click and drag you image should have rotate like mine.
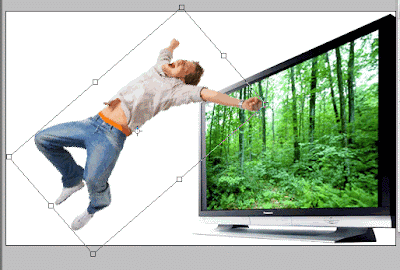 6. drag your man layer to over the big TV like mine if needed rotate it more.
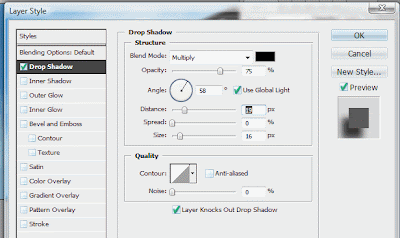
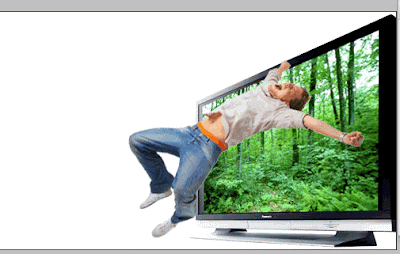 7. Now double click in the man layer in the layer palette and apply these setting in the layer style dialog box apply drop Shadow.
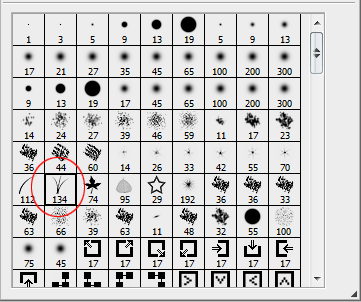
 8. Now we have every thing is done but one thing i have to create a grass ground so in this purposes i have to choose brush in the toolbar then right click anywhere in the canvas to bring the brush selection dialog box choose 134 brush number like the picture below.
 9. Create a new layer above the background layer like in the picture below and hold down the mouse left button and drag bottom side of the canvas like shown below.
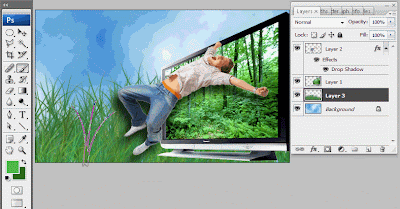 Now Our Final Image Should like this.
read more "Out Of Bound Effect In Adobe"
 1. First of all take these two pictures i have search on the google to find these.
 2. Open new Canvas like these settings.
 3. Bring two pictures into recently created canvas by selecting move tool ( V ) and click inside of the canvas and hold down the left mouse button drag over you new canvas repeat this step for second picture and your canvas should looks like mine but first remove any background of you picture if you are not now how follow my tut(Changing Background From Single Color).
 4. Now select the background layer in the layer palette and choose bright blue color as a foreground and white for background see the picture below. Then go to the Filter >> Render >> Cloud to apply the cloud filter our background layer.
 5. Now in the next step select the man in the canvas by clicking its layer icon in the layer palette or alternatively select move tool in the toolbar and make sure in the option bar auto select checkbox is checked and in the drop down choose layer then click any layer in the canvas to
easily select it. Then hit on the key board ( Ctrl + T ) to bring handles now drag your cursor out of the handles you will be noticed it has convert the arrow to rounded arrow now click and hold down the mouse left click and drag you image should have rotate like mine.
 6. drag your man layer to over the big TV like mine if needed rotate it more.
 7. Now double click in the man layer in the layer palette and apply these setting in the layer style dialog box apply drop Shadow.
 8. Now we have every thing is done but one thing i have to create a grass ground so in this purposes i have to choose brush in the toolbar then right click anywhere in the canvas to bring the brush selection dialog box choose 134 brush number like the picture below.
 9. Create a new layer above the background layer like in the picture below and hold down the mouse left button and drag bottom side of the canvas like shown below.
 Now Our Final Image Should like this.


