1. Open up the image in the adobe sample folder where you install adobe.
2. In the open sample folder select the (ducky.tif) and click open.
3. when open the image in your canvas double click the background icon in the layer palette.
It will be remove the locked icon attached it.
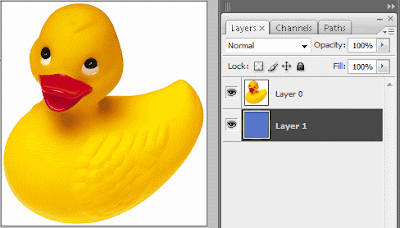
4. Create a new layer and fill the color what ever you like and send back to the image order
to stay behind the image of (ducky) look something like this shown below.

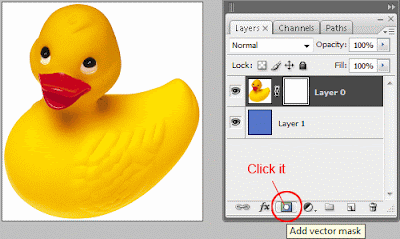
5. Select the ducky image layer and click below the layer palette mask icon to add layer mask
it should look something like this.

6. It is by default reveal all mode mean all area of the image is show it is used only two color to
show or hide areas black area in the mask layer will be hidden and white area of the layer will
not hidden.
7. In the layer palette by default layer mask is selected by indicating the white box around it in layer palette.
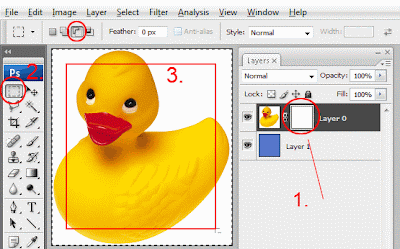
8. Now on your keyboard hit (Ctrl + A) to select all the mask and select the rectangle marquee
tool hold down the (Alt) and in the selected area of ducky select some area like shown below.

9. Hit the delete key or fill black to hide the area we selected.
Short Cut Tips
1. Hold down the Shift and clicking the layer mask layer to disable the layer mask and show the cross of it in red color re clicking to it to normal again.
2. Hold down the Alt and once again to clicking the layer to show up the actual mask it self to re clicking the mask to back to normal again.
Little Tip Apply Filter To Mask Layer
In the layer palette and the layer mask layer image (Ducky) in between these two layer a little lock chain click it first and then select the mask. Now go to Filter> Brush Strokes> Sprayed Strokes play it like different effect in mine Sprayed Strokes Stroke Length (12) Spray Radius (7) Stroke Direction to (Right Diagonal). Shown Below for mine.

0 comments:
Post a Comment
Hey readers, plz post comments related to topics only... :)