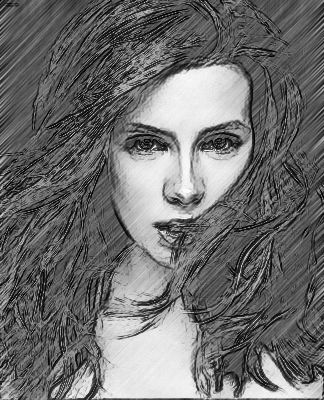
Lets see final result after is tut complete.......
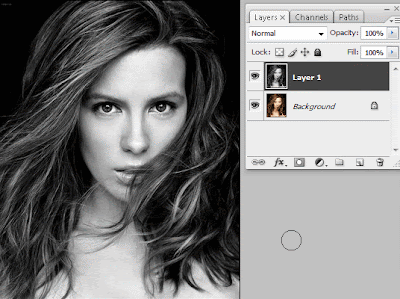
 1. Open any image you want to convert pencil sketch. Duplicate it once ( Ctrl + J ) to make another copy of our picture for backup or any purposes then convert it to black and white by clicking Image >> Adjustments >> Desaturate your image looking that in my picture.
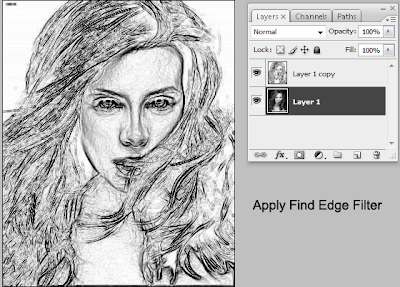
 2. In the top layer make sure it is still selected apply it to Filter >> Stylize >> Find Edges to make its edges more highlighted looked that in picture below.
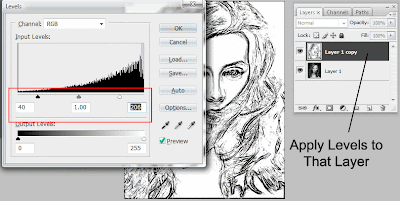
3. Next we make edges more light so in this case bring the levels dialog box ( Ctrl + L ) Apply to it these settings like i show you below.
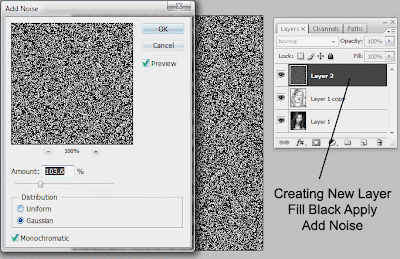
 4. Now one more step to apply is make a new layer by hitting new layer icon on the layer palette. Then fill it with black apply also Filter >> Noise >> Add Noise in the dialog box setting up Gaussian, Monochromatic Amount is (103.6 %).
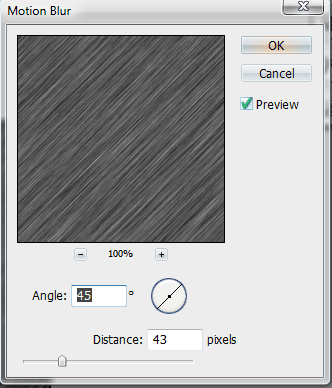
 5. For giving the dots the some angle go to the Filter >> Blur >> Motion Blur Apply Angle (45%), Distance (43 Pixels) hit ok to confirm it.
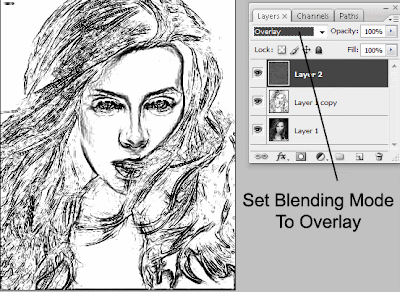
 6. Set new layer Blending mode to Overlay it will hid all black color of it only visible white angle lines.
 7. Selecting middle layer lower down the opacity to (50%) now our pencil effect is complete.
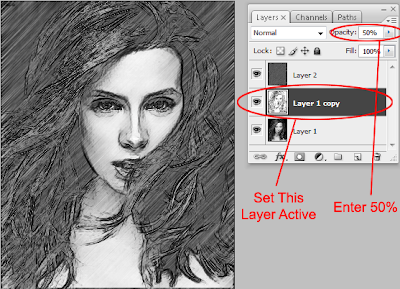 Here is our final Image after applying all the setting above in this tut.
4 comments:
I think it need camera photoshoot techniques.Shooted photo in different lights will change the way your picture looking.
Really like drawing by pencils. but my software still CS2.
I like this effect but I need to do it in multiple images how can I do it with out have to repeat all the proces
its easy dear you can record the action when you make the effect then apply this action to all your images.... :)
Post a Comment
Hey readers, plz post comments related to topics only... :)