In this tut i will show you the actual way how to use it in very step by step tut.
Lets start..... First See Final of our tutor

1. First Create a new document in about 300 x 200 px with white background.
2. Using Type tool Inter some text on the canvas to begin learn layer masking. Copy my setting like the picture below.
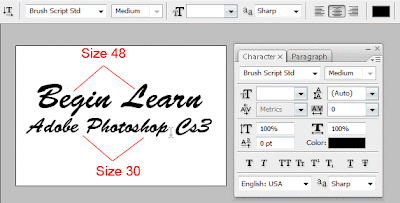 3. The text layer will create then clicking in the lower area of the layer palette say Add a Mask.
you will notice a white little square is created next to the type layer with a chain link. It is actually a layer mask to apply default show all.
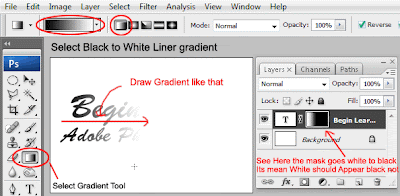
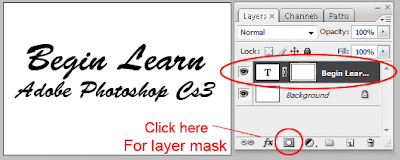 4. Now with still if your not click any where after the mask created it is still be selected. If not clicking it once to select the layer mask then selecting the gradient tool (G) in the toolbar. When you selecting the gradient tool the option bar updated to new information about gradient tool every time you select the tool it will change according to selected tool. In this case select the Gradient black to white with Liner mode. Draw it once clicking on the picture below hold down left mouse button drag over the canvas left to right. You will be notice in the layer palette the white area and the black area the black goes hide the text and white show the text mask.
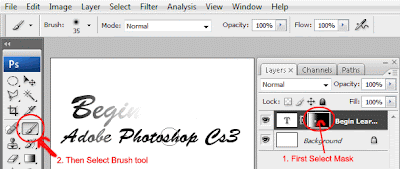
 5. Once again select the mask layer then select brush tool ( B ) then any size you like with 100% opacity 100% flow and make sure foreground color is white draw over the text you will be notice the text will appear if you paint it white it will show us the text if you paint it with black it will hide the area we painted. Play it more for better understanding.
 6. Remove the mask by clicking on the mask box with left mouse button still hold and drag it to the lower corner of the layer palette say Basket to remove the layer mask.
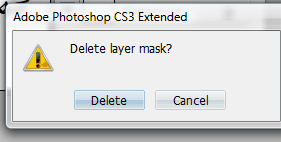
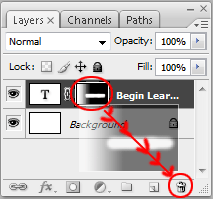 7. When you drag the layer mask to the basket it will give to warn us to delete layer mask?
Hit Delete button to delete the layer mask.
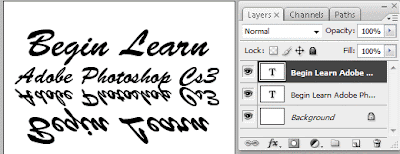
 8. Now duplicate the text layer by hitting ( Ctrl + J ) or drag over the new layer icon to bottom of the layer palette Flip it Vertically by going to Edit >> Transform >> Flip Vertically and adjust it to lower the text using Move tool (M). Like shown below
 9. In the same step we discuss above add a layer mask to the duplicated layer and apply the mask box a gradient black to white but this time top to bottom see the picture below for better understanding.
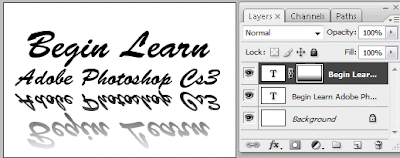 10. Finally apply background layer a gradient from blue to white top to bottom and the flipped layer opacity to 30% the result should like this.
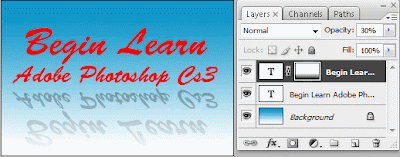 And here is the final of our process.
0 comments:
Post a Comment
Hey readers, plz post comments related to topics only... :)