See the Final Logo ....................
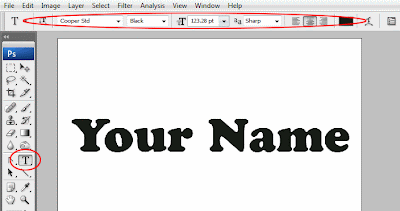
 1. Create a new canvas like ( 800x600 ) 72dpi . Enter your text as you like setting up the text layer like the picture is shown below.
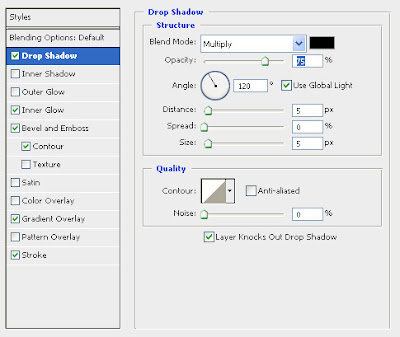
 2. Double Click the text layer to bring the Layer Style Dialog box now apply these setting in the Drop Shadow Dialog box shows here.
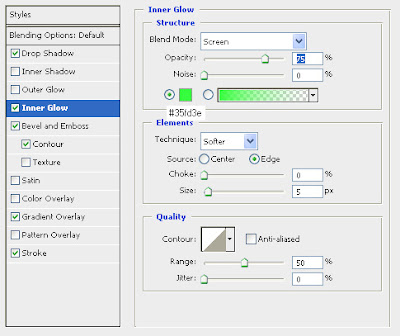
3. Now next once you apply all the setting Drop Shadow Now click on the Inner Glow apply these setting to the text layer.
 4. Apply these settings Bevel and Emboss.
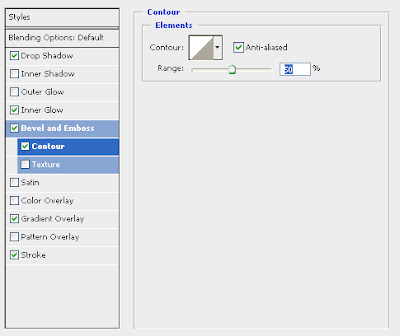
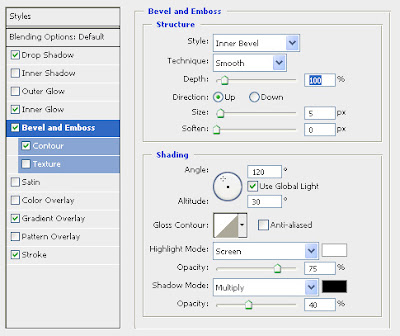 5. Next Apply Also the Contour about The range of 50%.
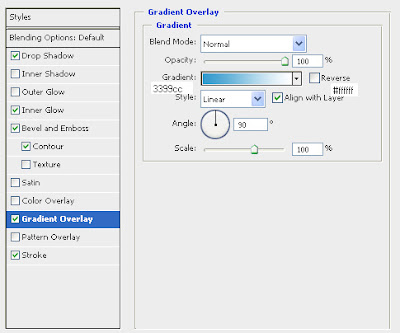
 6. This is most important apply Gradient Overlay for color our logo in the case choose light blue to white like i show the value in the picture below.
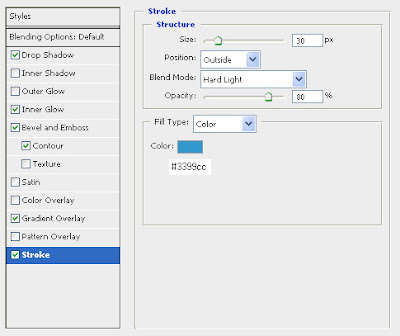
 7. Last layer effect is apply Stroke of it about size is ( 5px ) used of that tut but if you have big resolution bring him big value any way copy the setting as you like for comfortable.
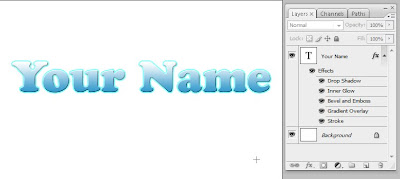
 8. Now the Long Exercise here come the result of our nice logo.
 9. Duplicate once the type layer Flip it by going Edit >> Transform >> Flip Vertically to flip it vertically see the image for understanding.
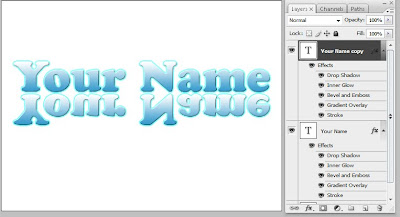 10. Now the tricky part is select in the layer palette duplicated layer in previously if is not selected now select it by once clicking on its thumb now hide the following effects of it.
Drop Shadow,Inner Glow,Bevel and Emboss. Now Double click on the gradient overlay it should looks like the first picture below by default the reverse check box is unchecked. Click it to reverse the Gradient flip layer should better looks. See the second picture.
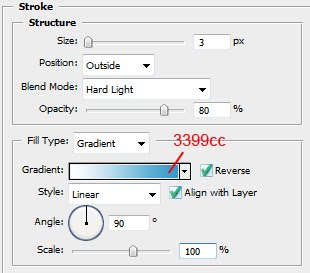
 11. Double click the stroke effect also and apply these settings like Fill Type: Drop down choose Gradient setting up light blue to white with reverse selected and the Angle of (90) hit ok to confirm the changes.
 12. The mirror effect is now looks better. Now select Elliptical marque tool in the toolbar draw the selection like this .
 13. Create a new layer by clicking very right bottom a little new layer icon click its icon once to create new layer then fill it with white and lower down the opacity to (30%). It will create the reflection effect on our logo.
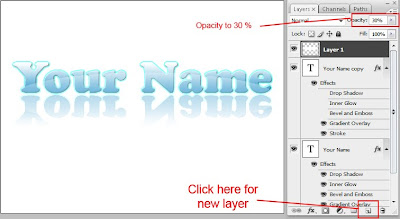 Finally after this tut is complete the final of our logo is here.
0 comments:
Post a Comment
Hey readers, plz post comments related to topics only... :)