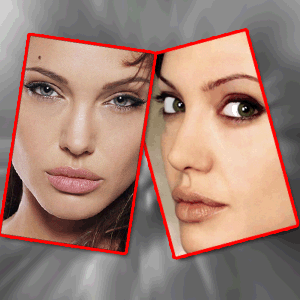
So lets start........ See Our Final Result After Tut Is Complete.
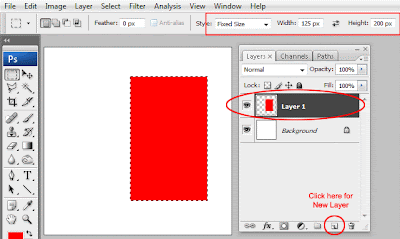
 1. First Create a new canvas about ( 300x300 ) 72 dpi. Select Rectangular Marque tool (M) in the option bar i we highlighted red in the Styles Drop down choose Fixed Size and enter
width 125px in height 200px. Then Clicking on the canvas you will notice it will automatically create a long box selection what you enter in the optionbar boxes. Then Create a new layer clicking bottom of the layer palette. Fill with selection red color of it like shown below.
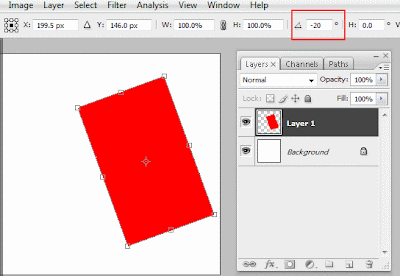
 2. Hit ( Ctrl + T ) on the key board it will bring up little box around our object in the option bar i highlighted it red angle field enter ( -20 ) to rotate it like shown below.
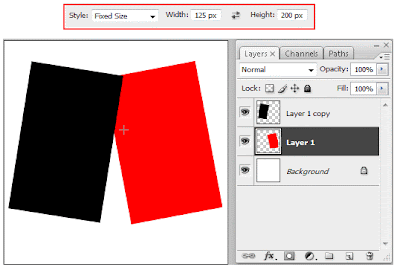
3. Create another layer and do same above steps or hitting ( Ctrl + J ) to duplicate the current layer and flip it Horizontally by going Edit >> Transform >> Flip Horizontal. Now you have to complete the actual frame now add some picture of it.
4. Open any two picture you have in my case i am open the anglina julies Pic on the Internet.
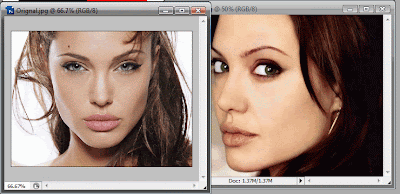 5. Select First image hit Ctrl + A to select hole picture close it by clicking upper right (X).
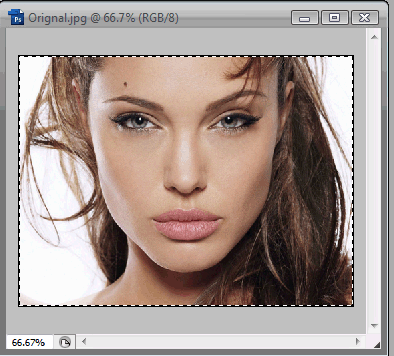 6. Now Select the top layer in the layer palette holding Ctrl Click once on its thumb to bring the selection of that layer see the picture below.
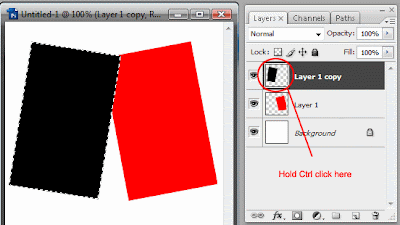 7. After you load the selection first layer go to the Edit >> Paste Into it will create a new layer automatically and apply the layer mask auto see the picture below for better understanding.
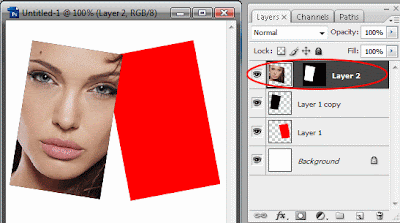 8. Clicking other layer by holding Ctrl to bring his selection then the same process copy the second image close it then go Edit >> Paste Into now you have done this but the problem is if the picture is big how to adjust it click the masked layer picture thumb then hit ( Ctrl + T ) to bring transformer control holding shift key pick any one corner to bring it in and in to reduce the size of it and setting it like shown below.
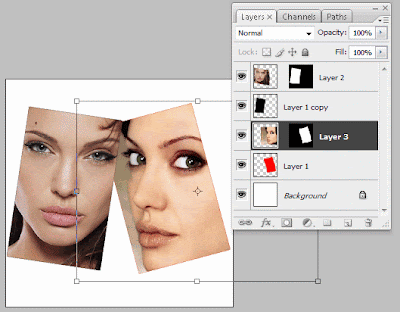 9. Selecting the Layer 1 Copy on the layer palette highlighted on Green. Double clicking of it to bring layer style dialog box apply Drop Shadow for these settings.
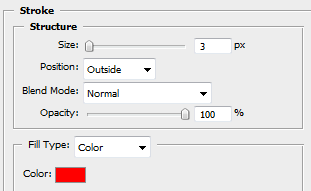
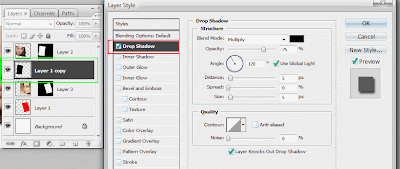 10. Apply also Stoke of like that settings.
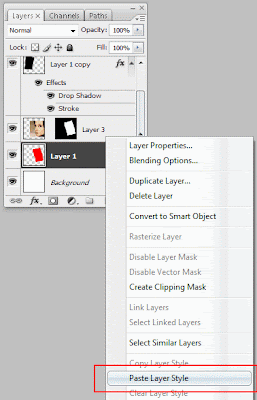
 11. Copy layer style by right clicking on the layer and choose Copy Layer Style. It will copy the all style we apply this layer.
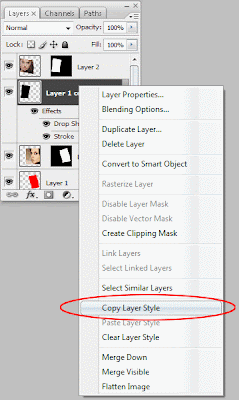 12. Right Clicking (Layer 1) and choose Paste Layer Style it will paste the layer style previously.
 Finally Draw some background effect to it our frame image looks like this.
1 comments:
5. Select First image hit Ctrl + A to select hole picture close it by clicking upper right (X).
Missing a step to copy image (Ctrl+C ) after Ctrl+A
Post a Comment
Hey readers, plz post comments related to topics only... :)