Hello for all users i bring up the new tut for you. How to create a water drops from scratch step by step approach in adobe photoshop cs3. There fore its really a lot of tut of that topic of the internet but i am tell you very easy way and every step how to create water drops.
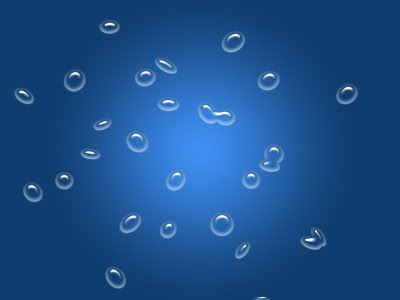
See Final result of our tutorial.
 1. First Open the new canvas like ( 400 x 300 ) 72dpi. Then remove the background lock by double clicking front of its name background it will bring up New Layer dialog box just hitting ok or enter the name of you want.
 2. Once more time double click the layer to bring up the Layer Style dialog box. In the appear dialog box choose Gradient Overlay choose lighter to darker blue color for Gradient and Choose Radial for Style type. For setting see below picture.
 3. Now our background is created. Now its time to create our water drops first so choose Brush (B) in the toolbar bring up the Brushes setting dialog box by hitting ( F5 ) or Window>> Brushes. The appearing dialog box click Brush Tip Shape and settings up like these setting see below.
 4. Now the next click on the Shape Dynamics and settings up like shown the picture below.
 5. Next clicking Scattering in the Brushes dialog box and setting all the setting below by reference picture.
 6. Create a new layer by clicking layer palette below for little folded paper from to right second icon or hitting on the keyboard ( Ctrl + Shift + Alt + N ) it will create a new layer then clicking on the canvas to start creating water drops but in this time its not real water drops don't worry.
 7. Now set the Fill to ( 0% ) for newly created layer to hide all the fill of this layer.
 8. Now here come the tricky stuff to creating actual water layer style first double clicking on the new water layer drop layer and apply Inner Shadow by these setting below the picture.
 9. Next apply the Inner Glow to our drops like these setting.
 10. Finally Apply Bevel and Emboss to our drops to complete the water Drops effect do the setting like shown the picture below.
 Here is the Final of our ended tut.
read more "Creating Water Drops In Adobe"
See Final result of our tutorial.
 1. First Open the new canvas like ( 400 x 300 ) 72dpi. Then remove the background lock by double clicking front of its name background it will bring up New Layer dialog box just hitting ok or enter the name of you want.
 2. Once more time double click the layer to bring up the Layer Style dialog box. In the appear dialog box choose Gradient Overlay choose lighter to darker blue color for Gradient and Choose Radial for Style type. For setting see below picture.
 3. Now our background is created. Now its time to create our water drops first so choose Brush (B) in the toolbar bring up the Brushes setting dialog box by hitting ( F5 ) or Window>> Brushes. The appearing dialog box click Brush Tip Shape and settings up like these setting see below.
 4. Now the next click on the Shape Dynamics and settings up like shown the picture below.
 5. Next clicking Scattering in the Brushes dialog box and setting all the setting below by reference picture.
 6. Create a new layer by clicking layer palette below for little folded paper from to right second icon or hitting on the keyboard ( Ctrl + Shift + Alt + N ) it will create a new layer then clicking on the canvas to start creating water drops but in this time its not real water drops don't worry.
 7. Now set the Fill to ( 0% ) for newly created layer to hide all the fill of this layer.
 9. Next apply the Inner Glow to our drops like these setting.
 10. Finally Apply Bevel and Emboss to our drops to complete the water Drops effect do the setting like shown the picture below.
 Here is the Final of our ended tut.


