 Create a Canvas (250x100 pixel). Fill it the black color.
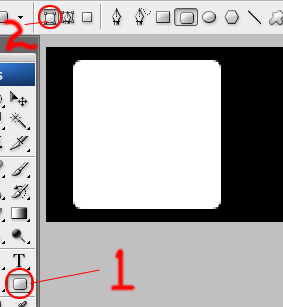
Now in the toolbar select the rounded rectangle shape tool and draw like shown below.
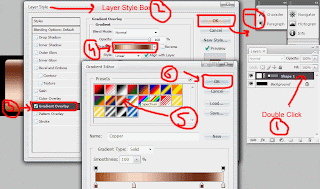
 In the next step go to layer palette and double click the shape layer you created. Layer style box will open up in the left side the layer style box choose gradient overlay then click the gradient color rectangle shown in picture below the box pop's up choose the Spectrum gradient then click ok gradient editor and click ok in the layer style box to confirm the style.
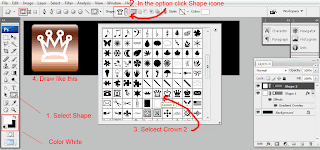
 Now the next step is make the crown in our box. Lets start to creating it. First in the toolbar click the shape icon like in the picture then in the option bar choose the shape the box appear like the picture fine the Crown 2 Shape i pointed out it drag it in the canvas like shown below.
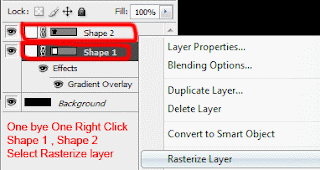
 Next step is to our shapes layer converted it to the pixel. In the layer palette one by one right clicking layer icon shown below and choose the rasterize layer this will convert the layer to pixel.
 In the next step i will delete the shape crown to the box with selection. Ok lets try it hold down the ctrl in your keyboard and click the shape 2 layer thumbnail it will select the pixel in the canvas like shown below now hide the Shape 2 clicking its left little eye. Now Select the Shape 1 and hit delete it will delete the selected area in shape 1 layer see image below.
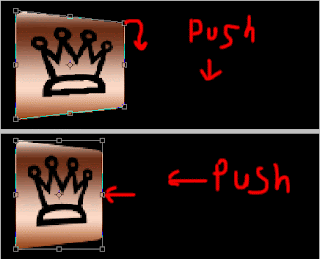
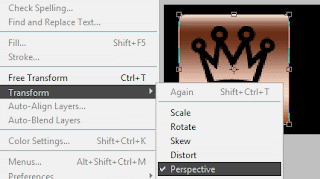 In Perspective selected select the top right little box in the mouse left button push it to downward a little to make the 3d effect like that corner is far away from us and in the Edit> Free Transform and shrink it a little to left see it below.
 Ok lets try entering some text to it. In the toolbar select the Type tools (T) Click front of the shape 1 and Enter the King setting up the font, font size, font color and in the end of the option bar a little character box clicking it a box appear like in the picture right side of the picture copy the setting same in the Character tab like shown below.
 And the Same technique above enter the (Advertiser) word with help of the picture below.
 In the last step is apply the crown box a little stroke outline. Double Clicking the layer shape 1 a layer style box appear in left bottom of the box click the stroke and setting the size to 1 and choose the setting like shown below.
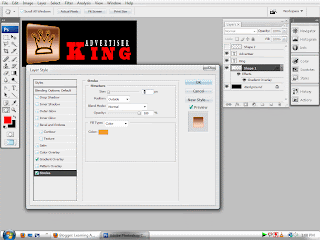
In some bevel emboss play it and in apply some gradient in background layer in my case final result looks like that .

I hope you enjoy this very much how to creating the basic of the logo creating.
2 comments:
Very Nice Work Sir I Like Very much So Nice Work Well Done Sir Well Done
Great work...nice
Post a Comment
Hey readers, plz post comments related to topics only... :)