
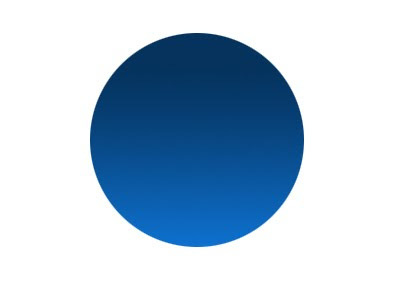
1.Create a New Layer (CRTL+N). Name the layer “Button1“.Using Elliptical Marquee Tool (M) create a circle.Hold SHIFT while dragging so you can form a perfect circle. Once you have a circle choose Gradient Tool (G). Use color #1081ed on Set Background Color and #05335e on Set Foreground Color then drag your mouse inside the circle.once your done it will look like this.
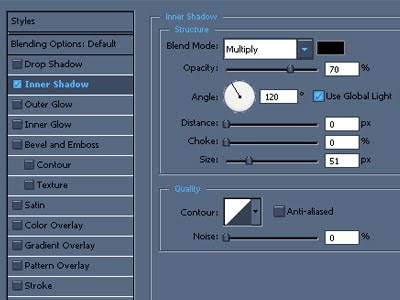
 2.Now Right click the Button1 layer then choose Blending Options. Then select Inner Shadow and follow the format on the image below.
 3. Choose Ellipse Tool (U).and make an ellipse shape on the upper part of the circle. Name the Layer “Ellipse1“. Right click the Layer Mask on the Ellipse Layer and choose Razterize Vector Mask. After that you’ll come up with something like this
 4.Click on Add Vector Maskand choose Gradient Tool (G) then set it in Foreground to Transparent. (I showed that already to you on my past tutorial so lets continue).So after you set it in Foreground to Transparent, drag your mouse down to up.
 5.Create a New Layer between Button1 Layer and Ellipse1 Layer. Use color #00c6ff.Choose the Ellipse Tool (U) again and make an ellipse shape this time on the lower part of the circle. Name the Layer Ellipse2 then Right click on the Ellipse2 Layer Vector Mask then choose Rasterize Vector Mask.it will go like this.
 6. Now go to Filter>Blur>Gaussian Blur.Then Set Radius into 12.Then it will look like this.
 7.Now set your Set Foreground Color in #f2f2f2 and Set Background Color in #716e6a. Then right click on Button1 Layer then go to Blending Options.Now Choose Stroke and follow the format on the image below.
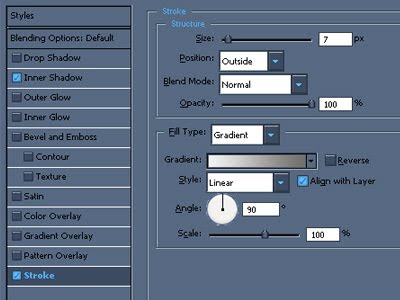 Then when you click OK it will look like this

8.We need to use stoke again on the Button1 Layer.Now Heres a trick. In order to use the Stroke again on Button1Layer create a new Layer then select the two Layer which is Button1Layer and the New Layer by holding SHIFT. Then right click on the 2 selected Layers then choose Merge Layers.Then Name it again in Button1.
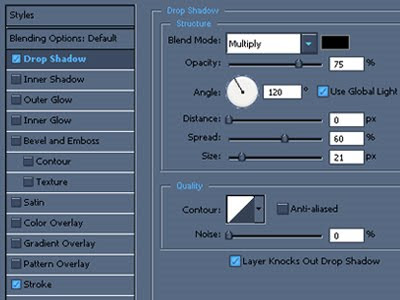
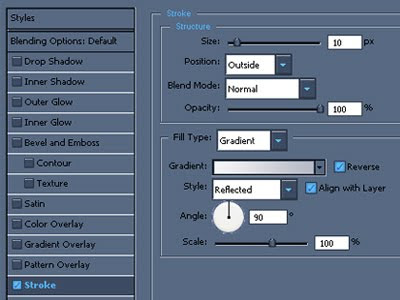 9.Now we already merge the 2 Layers.Set the Foreground Color in #b7b9c5 and in Background color in #f5f6f6. Then right click Button1Layer and go to Blending Options again.Follow the image below for the setting.
 After that your button will look something like this.

Now you can put whatever shape you want on the center of the button. You can also play whatever color you want.
heres what i made.

1 comments:
thanks 4 comment.i like ur blog . can u join in gtalk.
Post a Comment
Hey readers, plz post comments related to topics only... :)