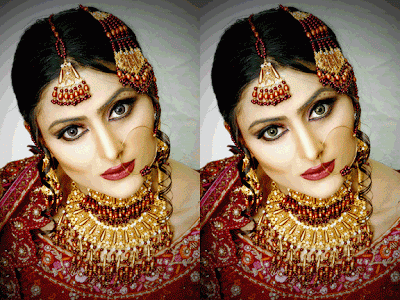
1. Here is the original and after image like shown below.
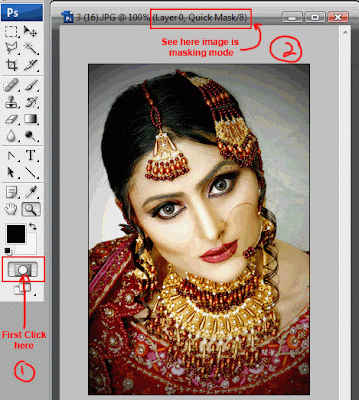
 2. First of all go to toolbar very bottom of it and select the mask mode (Q) it will changing the image to quick mask mode like shown this image.
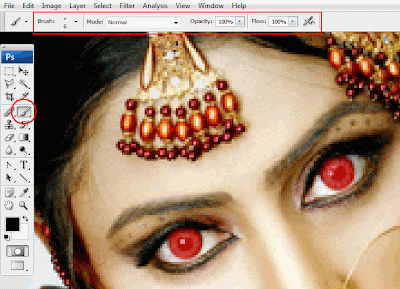
 3. Next once again go to the toolbar and select the brush tool (B) and go to the very top of the adobe photoshop cs3 have beneath the menu bar is option bar i pointed out it in red color box change the all of your setting to this like normal mode opacity 100% and flow also 100% and like the image below you see the eye i fill out the little brush size only eye area.
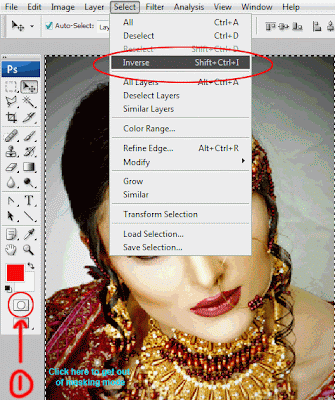
 4. Once again go to the very bottom of the toolbar and once again click the masking mode button it will get out the masking mode to back orignal mode but its appear the selection of my eye but with out the select of my eye but i want to select my eye selection only no all without it. We done it go to the top of the menu bar Select> Inverse (Shift + Ctrl + I) it will invert my selection back to only my eye.
 5. Now next i will changing the eye color of the image in this case go to the menu bar onece again select the Image> Adjustments > Hue/Saturation (Ctrl+U). Hue Saturation dialog box is appear.
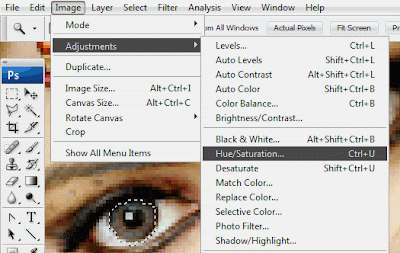 6. In my case i will have to change the color of green of my image eye so will select the very bottom of the dialog a check box colorize is unchecked first click it to check it to selected and now i will change the hue to (75) and saturation (28) and lightnes to zero click ok to finalized it.
 Here is the final image of mine your is little diffirent of mine if you not follow the step write of mine.
0 comments:
Post a Comment
Hey readers, plz post comments related to topics only... :)