In this tutorial i will show you the every step of how to do that in adobe photo shop cs3 to whitening the teeth.
So before i start out Here is the final image of Before After.
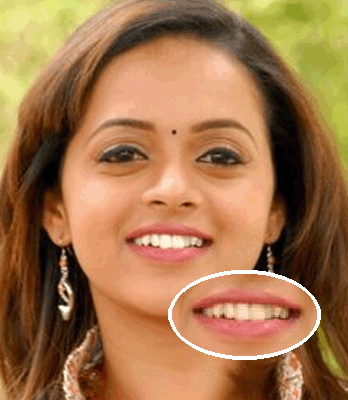 1. This is the original image of we working it. Lets start open it to adobe to start working it.
 2. Second step of is to click the lower of the toolbar quick mask mode icon then click the brush tool 100% of opacity smooth brush. Drag over the teeth area like shown below to select the teeth.
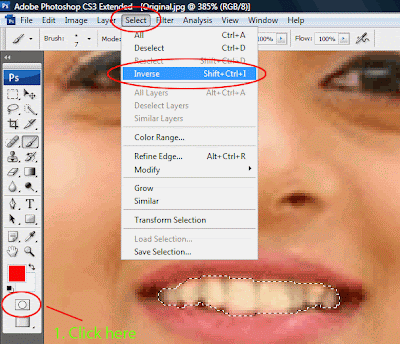
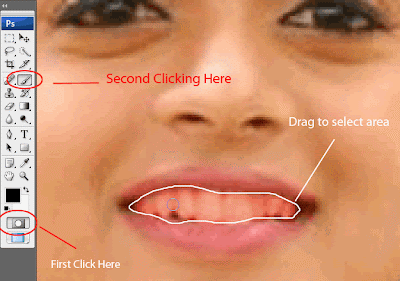 3. Then once more time clicking the quick mask mode icon in the toolbar to exit selecting the masking mode. Then go to the Select >> Inverse to inverse the selection by default selection is inverted of our selected area so for doing that is must.
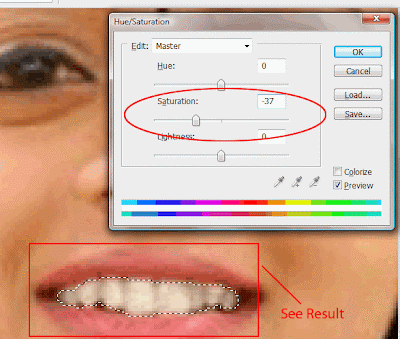
 4. Removing the yellow color of the teeth for this purposes i have to go the Image >> Adjustments >> Hue/Saturation (Ctrl + U) to bring up the Hue saturation dialog box.
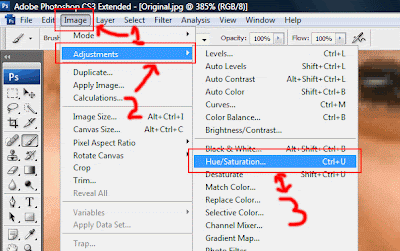 5. Here is the Hue/Saturation dialog box do the setting i we shown below only decrease the Saturation Slider about -37 watch out the result of it.
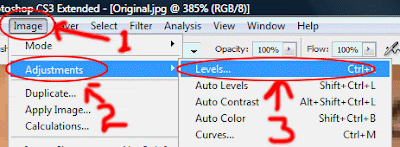
 6. For whitening the teeth of little go to the Image >> Adjustments >> Levels (Ctrl + L) to bring up the dialog box.
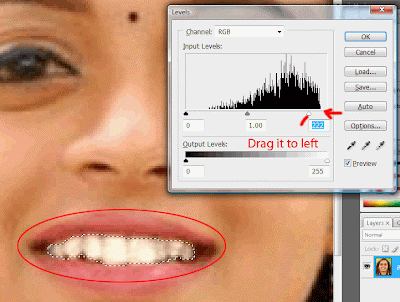
 7. Setting up a little right slider to bring left of some like ( 222 ) then ok to confirm it.
 8. The finally result of like this.
0 comments:
Post a Comment
Hey readers, plz post comments related to topics only... :)