Here come a new logo creating tut.
In this tut i will show you how to creating a adobe photoshop cs3 new logo from scratch different techniques used i created this logo.
Now i will give you the step by step tut of that logo how to create that very nice logo.
Here is the Final One In the end of Tut.
 1. Double clicking a background layer to get out of the lock front of it. Create a new canvas and fill it with Filter>> Texture>> Texturizer
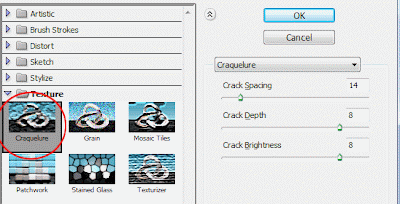
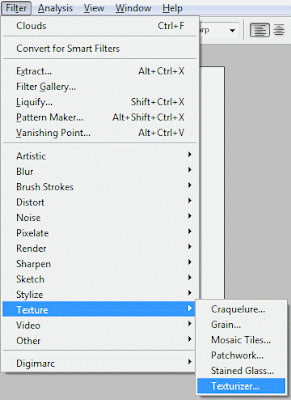 2. Choose Craquelure i we highlighted it red then in the right side of the dialog box copy all the setting will i do.
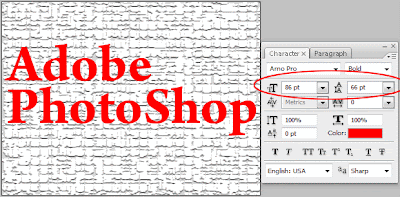
 3. Next With Type tool enter Adobe Photoshop only in the right side Character palette choose same setting for this kind of tut shown below.
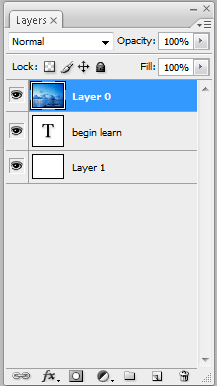
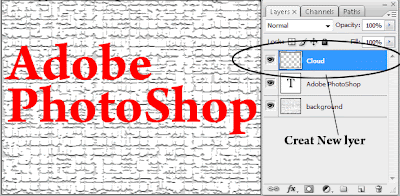
 4. Create a new layer name it Cloud set it top of all layers.
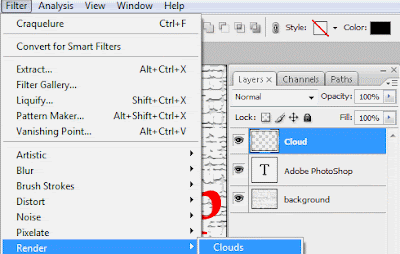
 5. Reset the color by hit on the ( D ) key on the keyboard apply the Filter>> Render>> Cloud
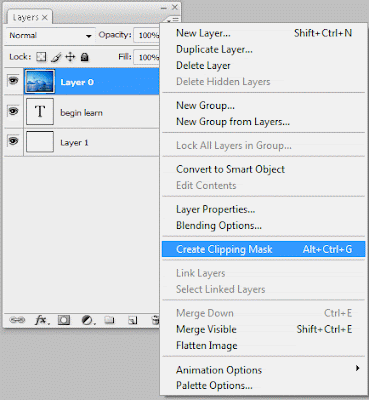
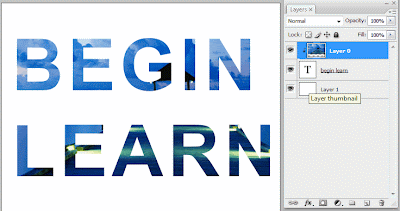
 6. Make sure cloud layer still selected go to the Layer>> Create Clipping Mask (Alt+Ctrl+G) to make a clipping mask of text layer.
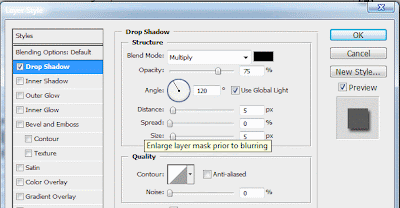
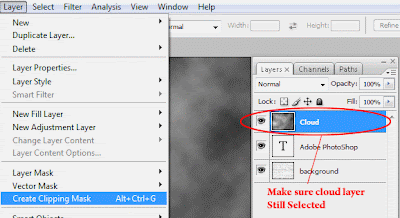 7. Now select the Text layer and Double clicking over it bring up the Layer Style box. Check the Drop Shadow and setting up like shown below.
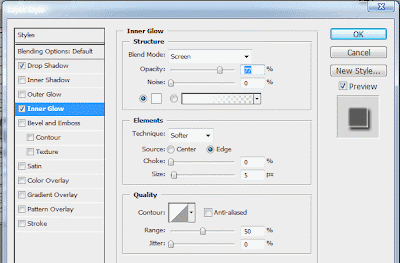
 8. Clicking the Inner Glow and settings the same value i shown below.
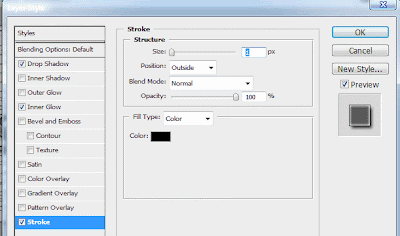
 9. Lastly apply the stroke of 1px of it with black color.
 10. Now After All Our Logo will looks like this.
 11. With the help of type tool Enter C,S,3 separate layers.
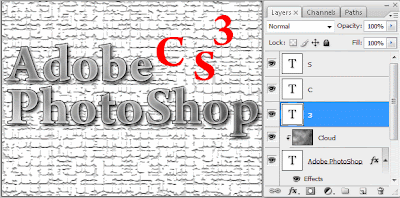 12. First select layer shown below in this case (3) and Scale up rotate some and adjust it like shown below.
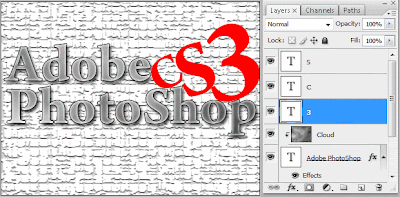
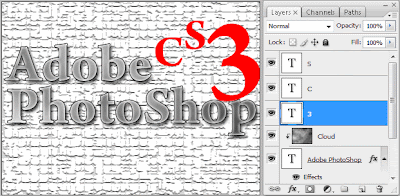 13. Now Rest of (C, S) will adjusted with same technique above scale rotate etc.
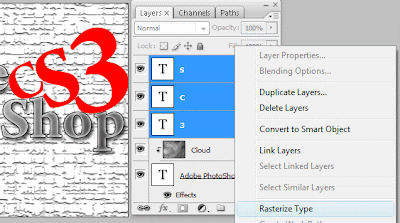
 14. Select new three layers by holding down (Ctrl) on keyboard. Right clicking any layer and choose Rasterize Type like shown below.
 15. With three layers still selected hit (Ctrl + E) to make merge the layer to one.
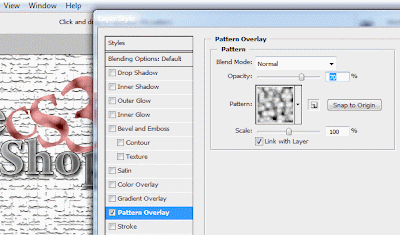
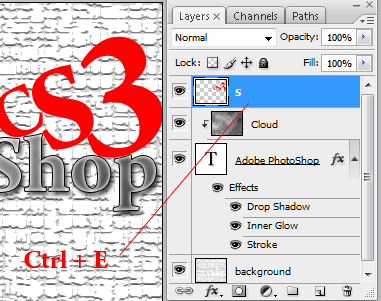 16. Double click new merge layer to bring up layer style dialog box and choose Pattern Overlay settings it like shown below.
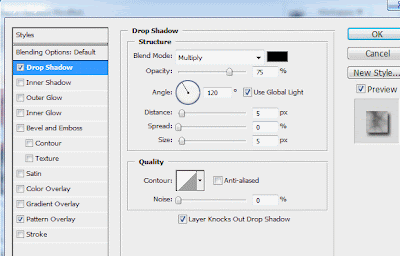
 17. Apply some Drop Shadow for setting Drop Shadow see picture below.
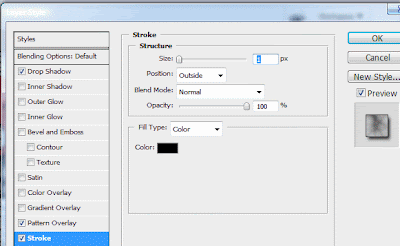
 18. Apply a stroke of 1px black outside 100 opacity hit ok to apply the effect.
 Finally Logo Is Shown This .

read more "Adobe PhotoShop Cs3 Logo Creating"
In this tut i will show you how to creating a adobe photoshop cs3 new logo from scratch different techniques used i created this logo.
Now i will give you the step by step tut of that logo how to create that very nice logo.
Here is the Final One In the end of Tut.
 1. Double clicking a background layer to get out of the lock front of it. Create a new canvas and fill it with Filter>> Texture>> Texturizer
 2. Choose Craquelure i we highlighted it red then in the right side of the dialog box copy all the setting will i do.
 3. Next With Type tool enter Adobe Photoshop only in the right side Character palette choose same setting for this kind of tut shown below.
 4. Create a new layer name it Cloud set it top of all layers.
 5. Reset the color by hit on the ( D ) key on the keyboard apply the Filter>> Render>> Cloud
 6. Make sure cloud layer still selected go to the Layer>> Create Clipping Mask (Alt+Ctrl+G) to make a clipping mask of text layer.
 7. Now select the Text layer and Double clicking over it bring up the Layer Style box. Check the Drop Shadow and setting up like shown below.
 8. Clicking the Inner Glow and settings the same value i shown below.
 9. Lastly apply the stroke of 1px of it with black color.
 10. Now After All Our Logo will looks like this.
 11. With the help of type tool Enter C,S,3 separate layers.
 12. First select layer shown below in this case (3) and Scale up rotate some and adjust it like shown below.
 13. Now Rest of (C, S) will adjusted with same technique above scale rotate etc.
 14. Select new three layers by holding down (Ctrl) on keyboard. Right clicking any layer and choose Rasterize Type like shown below.
 15. With three layers still selected hit (Ctrl + E) to make merge the layer to one.
 16. Double click new merge layer to bring up layer style dialog box and choose Pattern Overlay settings it like shown below.
 17. Apply some Drop Shadow for setting Drop Shadow see picture below.
 18. Apply a stroke of 1px black outside 100 opacity hit ok to apply the effect.
 Finally Logo Is Shown This .